Step 1: Create Your First Automation
Time to complete: ~2 minutes
What you'll do: Create a new automation and select your template
What you'll need: A Google account and a Google Doc template (or create one)
The first step is to create a new automation in Gdocify. This is where you'll configure everything for your document generation.
Starting from the Dashboard
Before proceeding, make sure you've completed all Quick Start Guide prerequisites—most importantly, that your Google account is connected and all necessary permissions are granted.
- Log in to app.gdocify.com
- You'll see your dashboard with a list of automations (empty if this is your first time)
- Click the "Select from Google Drive"

Selecting Your Template
Use an Existing Google Doc
- Click "Select from Google Drive"
- Use the Google Drive Picker to find and select your template
- Click on your newly created automation from the dashboard to open it
Note: If you don't have a Google Doc template yet, you can quickly create a new one using this Simple Resume Template, which is used in the demo. Alternatively, you can start a blank document by clicking here.
Understanding the Editor Interface
Once your template is selected, you'll see the Gdocify editor:
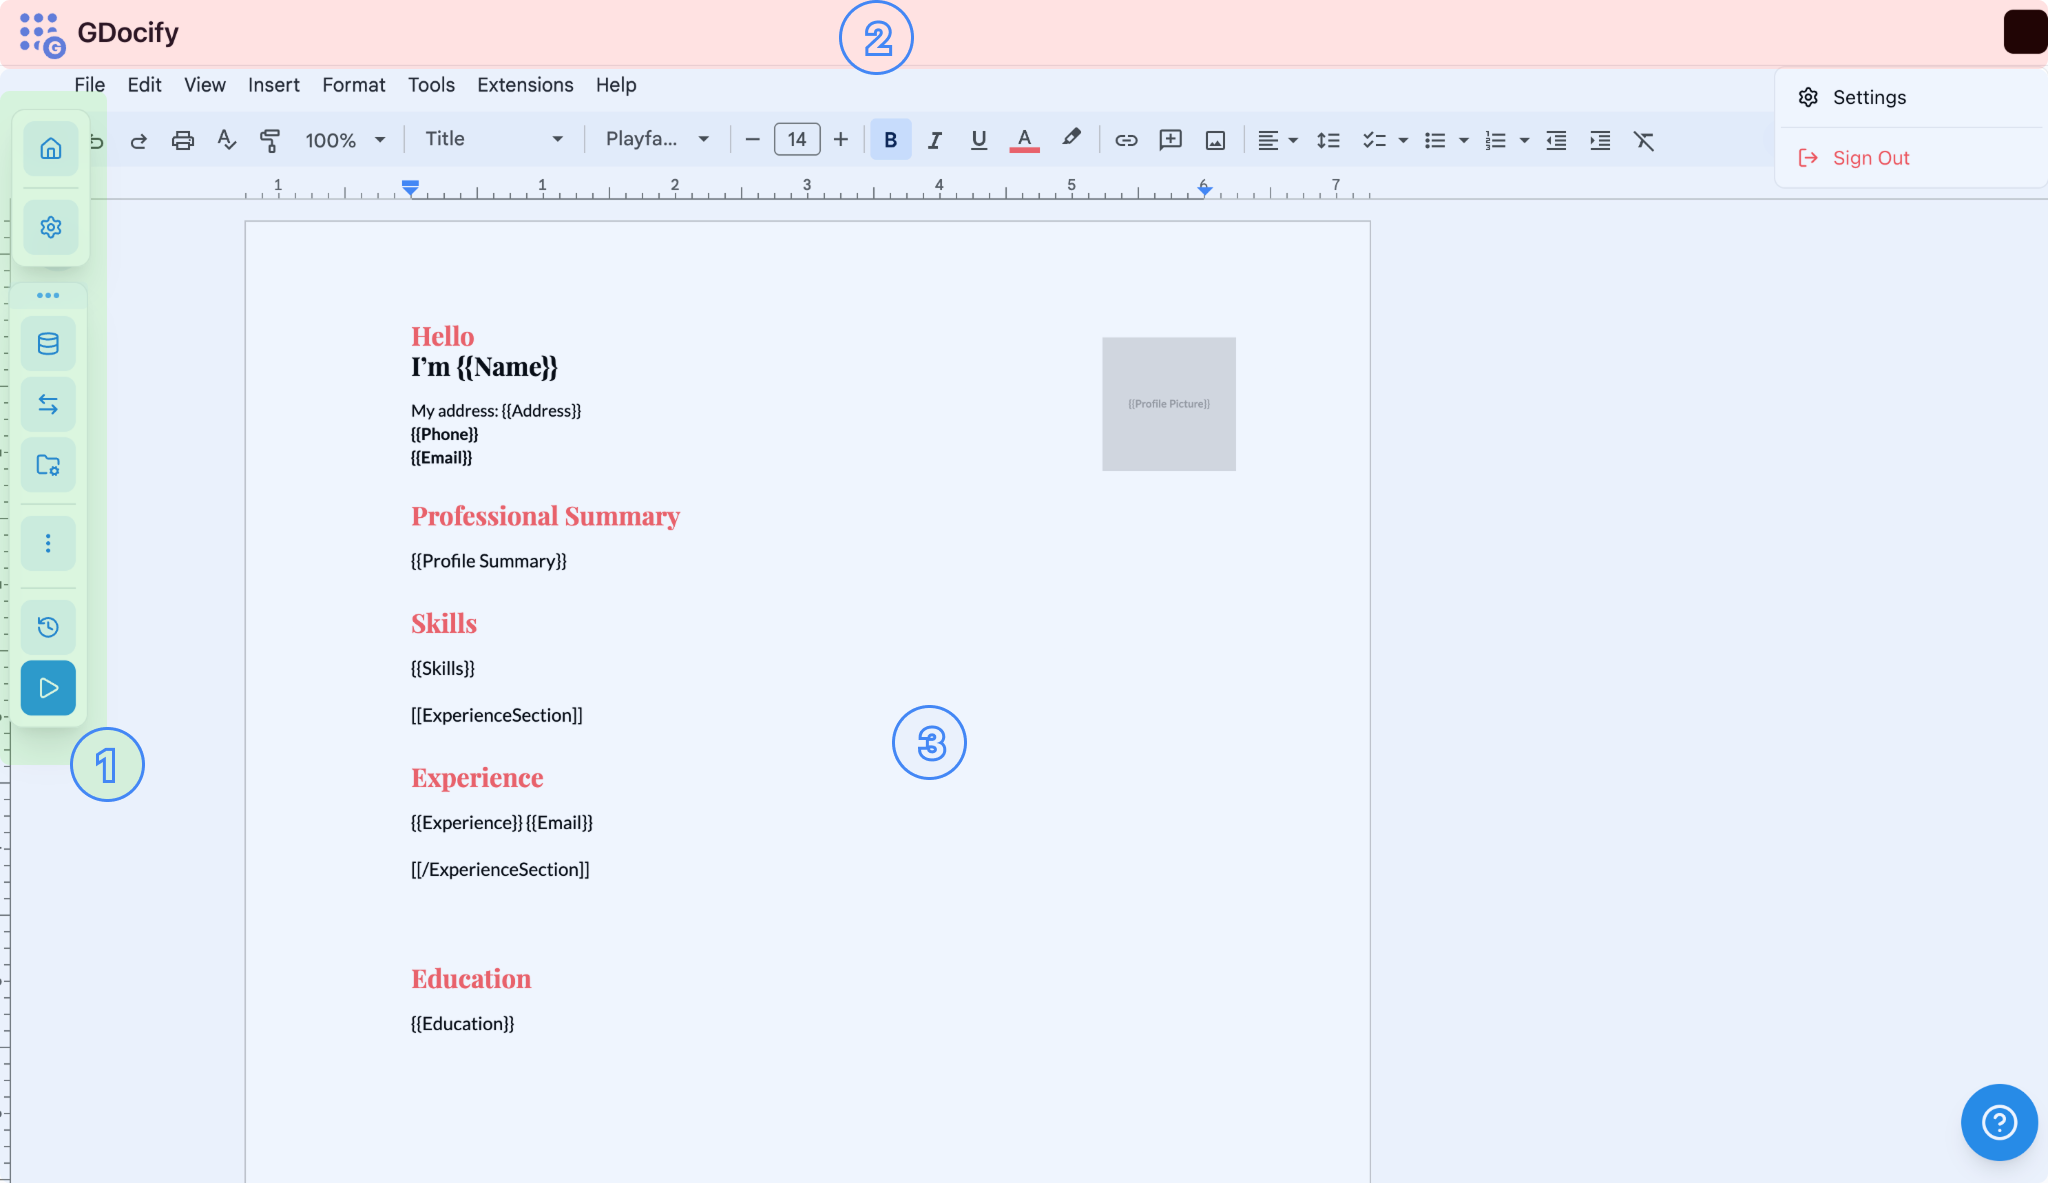
- Left side: Configuration panels (floating buttons)
- Top: Settings and navigation options
- Center: Your Google Doc template (embedded)
The editor is a full-screen Google Docs interface where you can:
- Edit your template directly
- Add placeholders
- Format text and images
Expected Result
After completing this step, you should see:
- ✅ A new automation created in your dashboard
- ✅ The Gdocify editor open with your template
- ✅ Your Google Doc template visible in the editor
You're now ready to connect your data source! Continue to Step 2: Connect Your Data Source.
Quick Troubleshooting
"Template not loading"
- Make sure you are logged in with the same Google account that has access to your Google Docs
- Check that you have permission to view the document
- Try selecting a different document
- If you are using Brave Browser, turn off the Brave Shields (ad/tracker blocker). The blocker can prevent Google Docs from loading properly within the editor.