Step 6: Set Up Triggers
Time to complete: ~2 minutes
What you'll do: Configure how to start document generation
What you'll need: Understanding of your preferred trigger method (manual, button, webhook, or API)
Triggers are the "go button" that tells Gdocify to generate documents. They determine when and how your automation runs.
What Are Triggers?
Triggers are different ways to start your automation:
- Manual trigger: Click a button in your Airtable base
- Webhook: Call a URL from another app
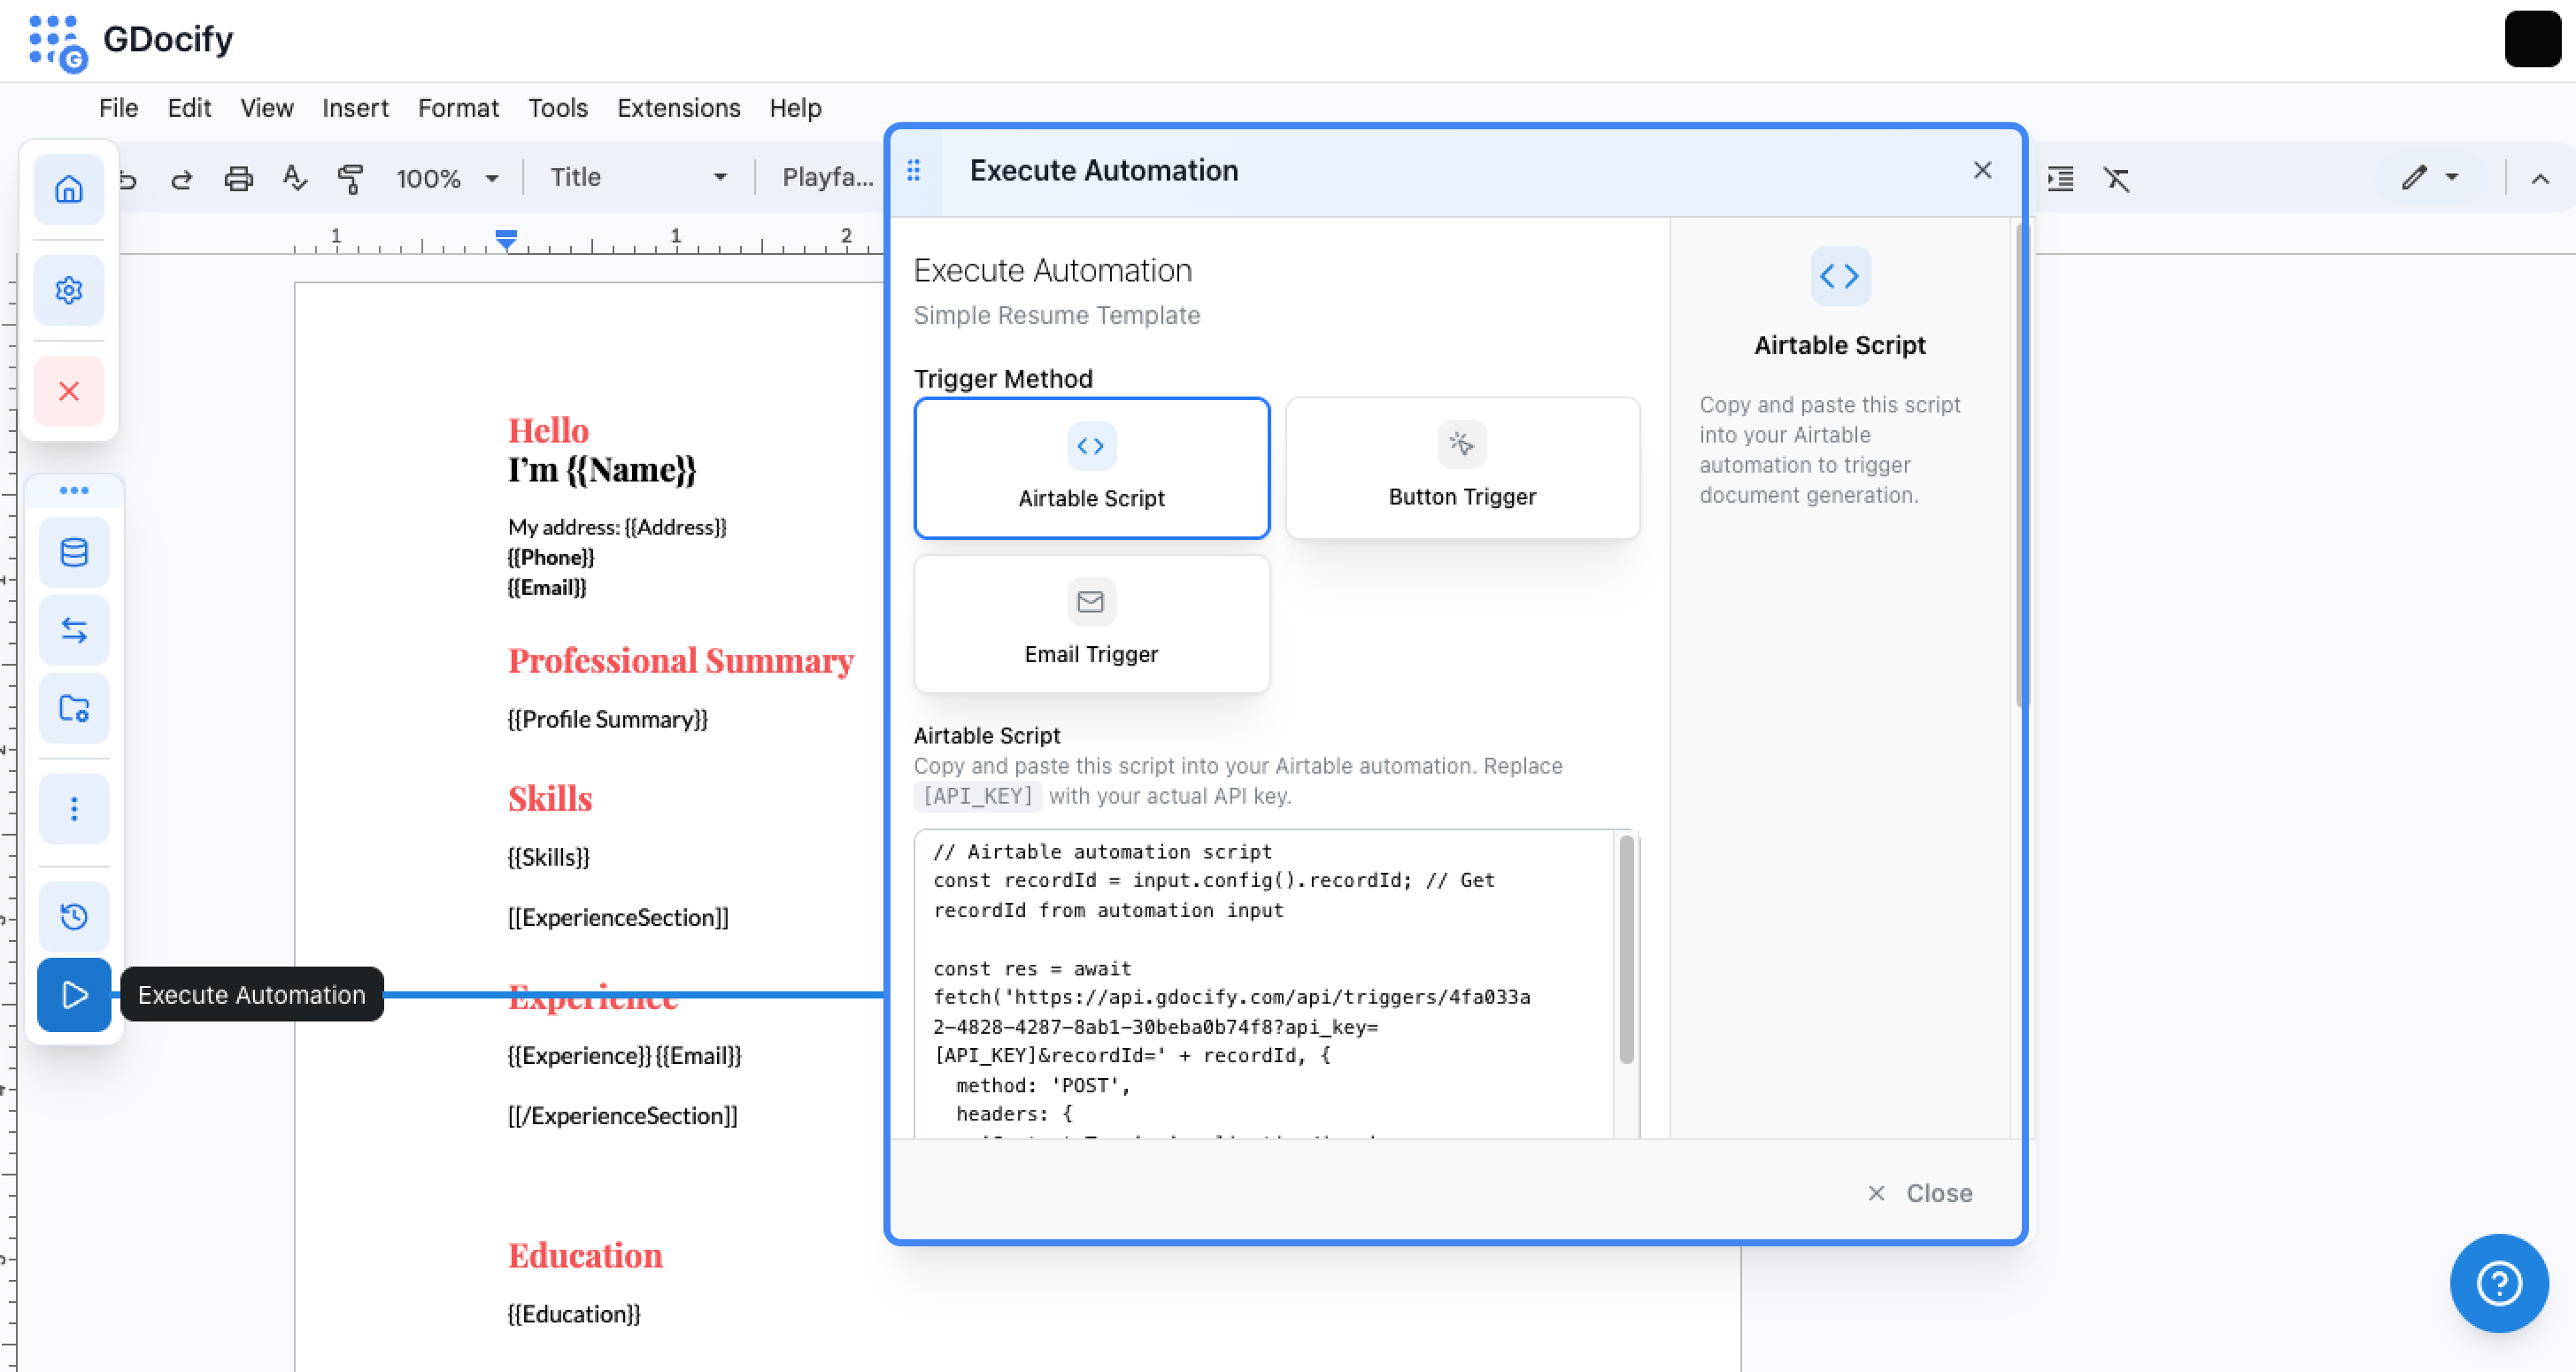
Opening Trigger Configuration
- Click the "Execute Automation" button (play icon in the bottom-left sidebar)
- The Execute Automation dialog opens, showing trigger methods based on your data source
Trigger methods depend on your connected data source. Airtable supports Script, Button, and Email triggers. Google Sheets and other sources use webhooks or manual triggers. For trigger details specific to your data source, see the Airtable, Google Sheets, or other integration guides.
Airtable Triggers
If your data source is Airtable, you'll see three trigger options in the Execute Automation dialog: Airtable Script, Button Trigger, and Email Trigger. Each is described below.
1. Airtable Script Trigger
Use an Airtable automation with a "Run script" action to trigger document generation. Copy the script from the Execute Automation dialog in Gdocify, or use this pattern:
Copy and paste this script into your Airtable automation. Replace [API_KEY] with your actual API key from Settings, and use the trigger URL and parameters shown in your Execute Automation dialog.
const recordId = input.config().recordId; // Get recordId from automation input

const response = await fetch(
  'https://api.gdocify.com/api/triggers/YOUR_TRIGGER_ID?api_key=[API_KEY]&recordId=' + recordId,
  {
    method: 'POST',
    headers: { 'Content-Type': 'application/json' },
  }
);
How to use
- Copy the script from the Execute Automation dialog in Gdocify (it will include your actual trigger ID)
- Open your Airtable base and go to Automations
- Create a new automation or edit an existing one
- Add a "Run script" action step
- Paste the script and replace
[API_KEY]with your actual API key from Settings - Configure the input to pass
recordIdfrom your trigger record - The script will automatically trigger document generation when the automation runs
- Replace
[API_KEY]with your actual API key from Settings - The
recordIdvariable should be passed from your automation's trigger configuration - The script uses Airtable's fetch API, which is available in automation scripts
2. Button Trigger
Add a button field in your Airtable table that, when clicked, triggers document generation for that record.
Airtable Button URL Formula
Copy the URL formula from the Execute Automation dialog, or use this pattern. Replace [API_KEY] with your actual API key and YOUR_TRIGGER_ID with the trigger ID shown in Gdocify:
"https://api.gdocify.com/api/triggers/YOUR_TRIGGER_ID?api_key=" & "[API_KEY]" & "&recordId=" & RECORD_ID()
How to use
- Copy the URL formula from the Execute Automation dialog in Gdocify
- Open your Airtable base and go to the table where you want the button
- Create a new field and select "Button" as the field type
- In the button configuration, select "Open URL" as the action
- Paste the formula into the "URL formula" field
- Replace
[API_KEY]with your actual API key from Settings - Click "Create field" to save the button
- When users click the button, it will trigger document generation for that record's ID
- Replace
[API_KEY]with your actual API key from Settings - The
RECORD_ID()function automatically passes the current record's ID when the button is clicked - This trigger uses a GET request (the button opens the URL in a new tab), unlike the script trigger which uses POST
- The button will open the URL in a new tab when clicked, triggering the automation
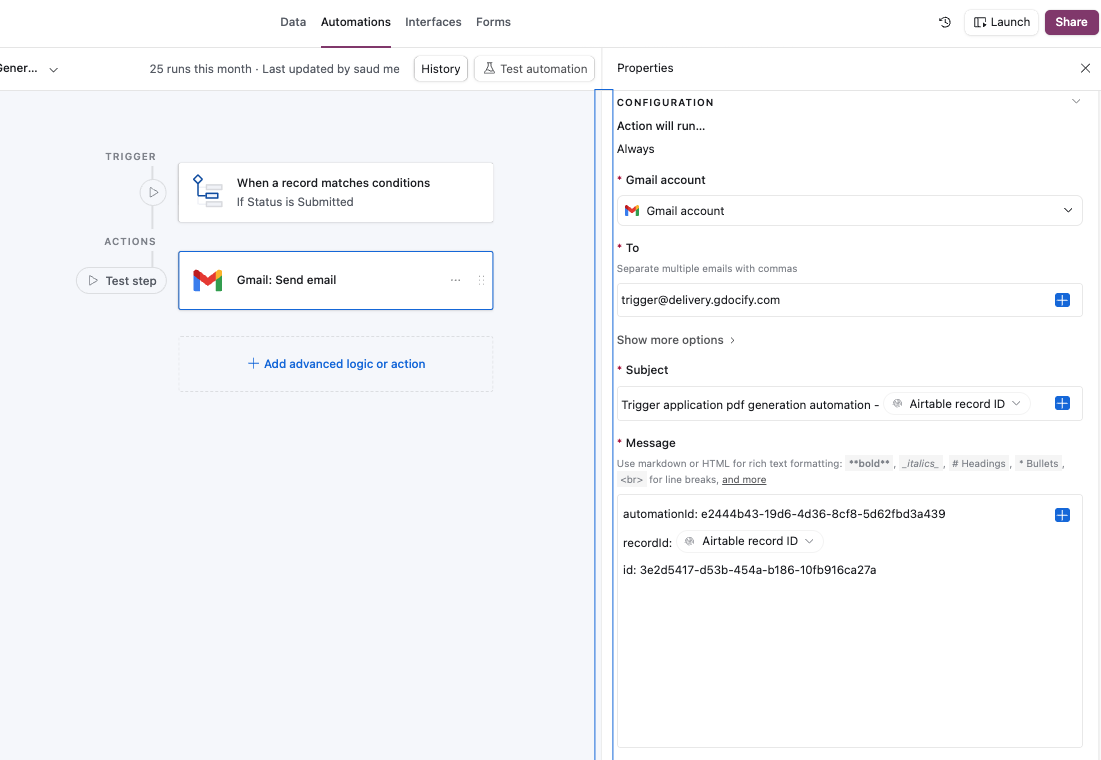
3. Email Trigger
Send an email to a Gdocify address to trigger your automation. Use this from Airtable automations or any tool that can send email.
The "Run script" action in Airtable is only available on Teams and higher plans. If you're on a Free Airtable account, you can't use the Airtable Script trigger. The Email Trigger lets you automate document generation anyway: set up an Airtable automation that runs when a record is created or updated, add a "Send email" action (using Gmail—see below), and Gdocify generates the document when the email is received. No script or paid plan required.
To: trigger@delivery.gdocify.com
Subject: Trigger Automation (or any subject you prefer)
Body template: Copy from the Execute Automation dialog. Replace [recordId] with the actual record ID from your Airtable record. The format must include all three fields:
automationId: YOUR_AUTOMATION_ID
recordId: [recordId]
id: YOUR_ID
How to use
- Copy the email address, subject, and body template from the Execute Automation dialog in Gdocify
- Open your Airtable base and go to Automations
- Create a new automation or edit an existing one
- Add a "Send email" action step. When Airtable asks how to send the email, choose Gmail (connect your Gmail account if needed)—don't use Airtable's native "Send email" option.
- Set the recipient to: trigger@delivery.gdocify.com
- Use the subject and body template, replacing
[recordId]with the actual recordId from your trigger record - The automation will trigger when the email is received
- The body template format is mandatory—all three fields (
automationId,recordId,id) must be present - Replace
[recordId]with the actual recordId from your Airtable record - The
automationIdandidare pre-filled in the template shown in Gdocify - The email subject can be customized to anything you prefer
Tips
- Start with manual triggers: Easiest way to test your automation
- Test before scaling: Always test with one record before running for hundreds
- Use appropriate triggers: Choose the trigger type that fits your workflow
- Document your triggers: Note which trigger you're using for future reference
Common Issues
- "Trigger not working": Check that you've copied the URL correctly
- "No records found": Make sure your data source has records and they're accessible