Step 2: Connect Your Data Source
Time to complete: ~3 minutes
What you'll do: Connect Gdocify to your data source (Airtable, Google Sheets, or API)
What you'll need: Access to your data source and authorization to connect
Your data source is where Gdocify gets the information to fill into your template. This could be an Airtable base, Google Sheet, or API endpoint.
Why You Need a Data Source
Think of your data source as a spreadsheet or database that contains all the information you want to put into your documents. For example:
- A list of candidates with their names, skills, and experience (for resumes)
- A list of customers with their addresses and order details (for invoices)
- A list of students with their names and course completions (for certificates)
Gdocify reads this data and uses it to fill in the placeholders in your template.
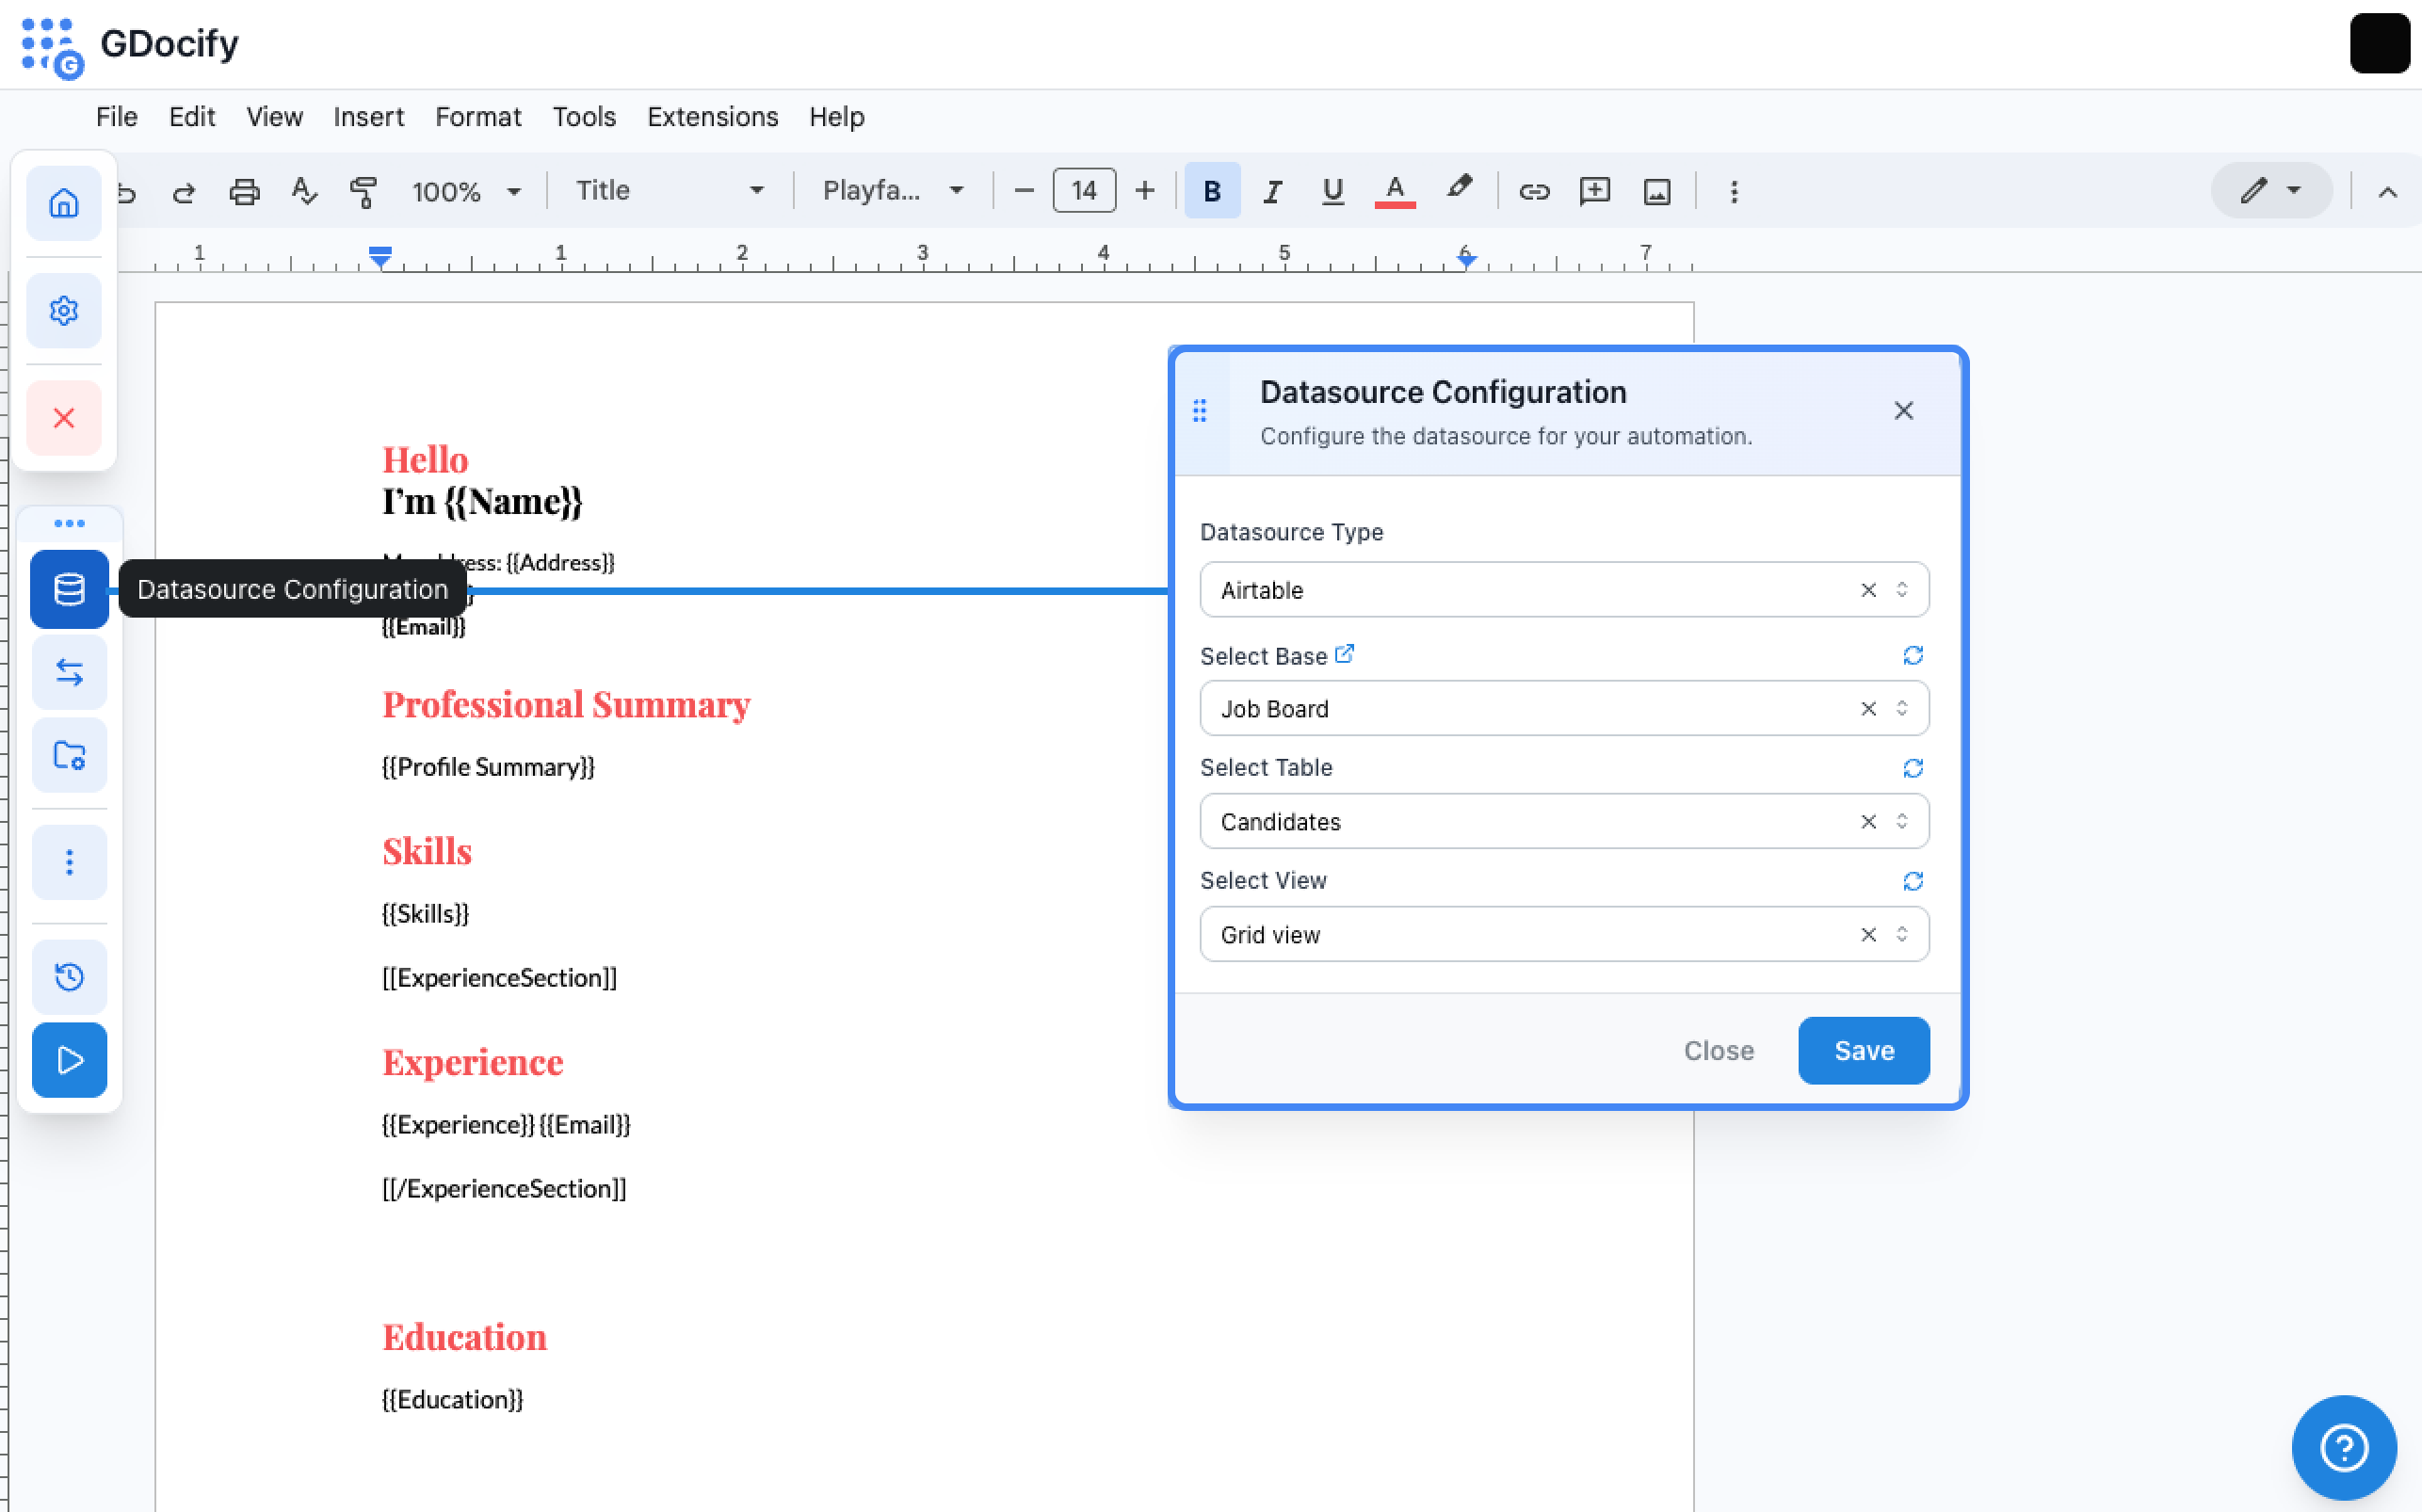
Connecting Airtable
To connect Gdocify to Airtable:
- Click the "Datasource Config" button (the floating button in the top-right corner of the editor).
- Choose "Airtable" as your data source type.
- If you haven’t already connected your Airtable account, go to Settings/Integration and click "Connect to Airtable Account". Follow the prompts to grant Gdocify permission to access your Airtable base.
- Once connected, return to the Datasource Config and select your Airtable Base.
- Select your Table (the specific table holding your data).
- Optionally, select a View to filter the records that will be used.
What Happens Next?
Once connected, Gdocify can see all the fields in your data source. Now you're ready to add placeholders to your template! Continue to Step 3: Add Placeholders to Your Template.
Common Issues
- "Permission denied": Make sure you've authorized Gdocify to access your data source
- "No data found": Check that you've selected the correct base/table/view