Step 5: Configure Result Settings
Time to complete: ~2 minutes
What you'll do: Set up where and how generated documents are saved
What you'll need: Google Drive access and folder organization plan
Result settings tell Gdocify where to save your generated documents and how to name them. This is where you organize your output.
What Are Result Settings?
Result settings control:
- Where documents are saved - Which Google Drive folder
- What format - Google Docs, PDFs, or both
- How they're named - Using templates with placeholders
- Organization - Keeping everything tidy
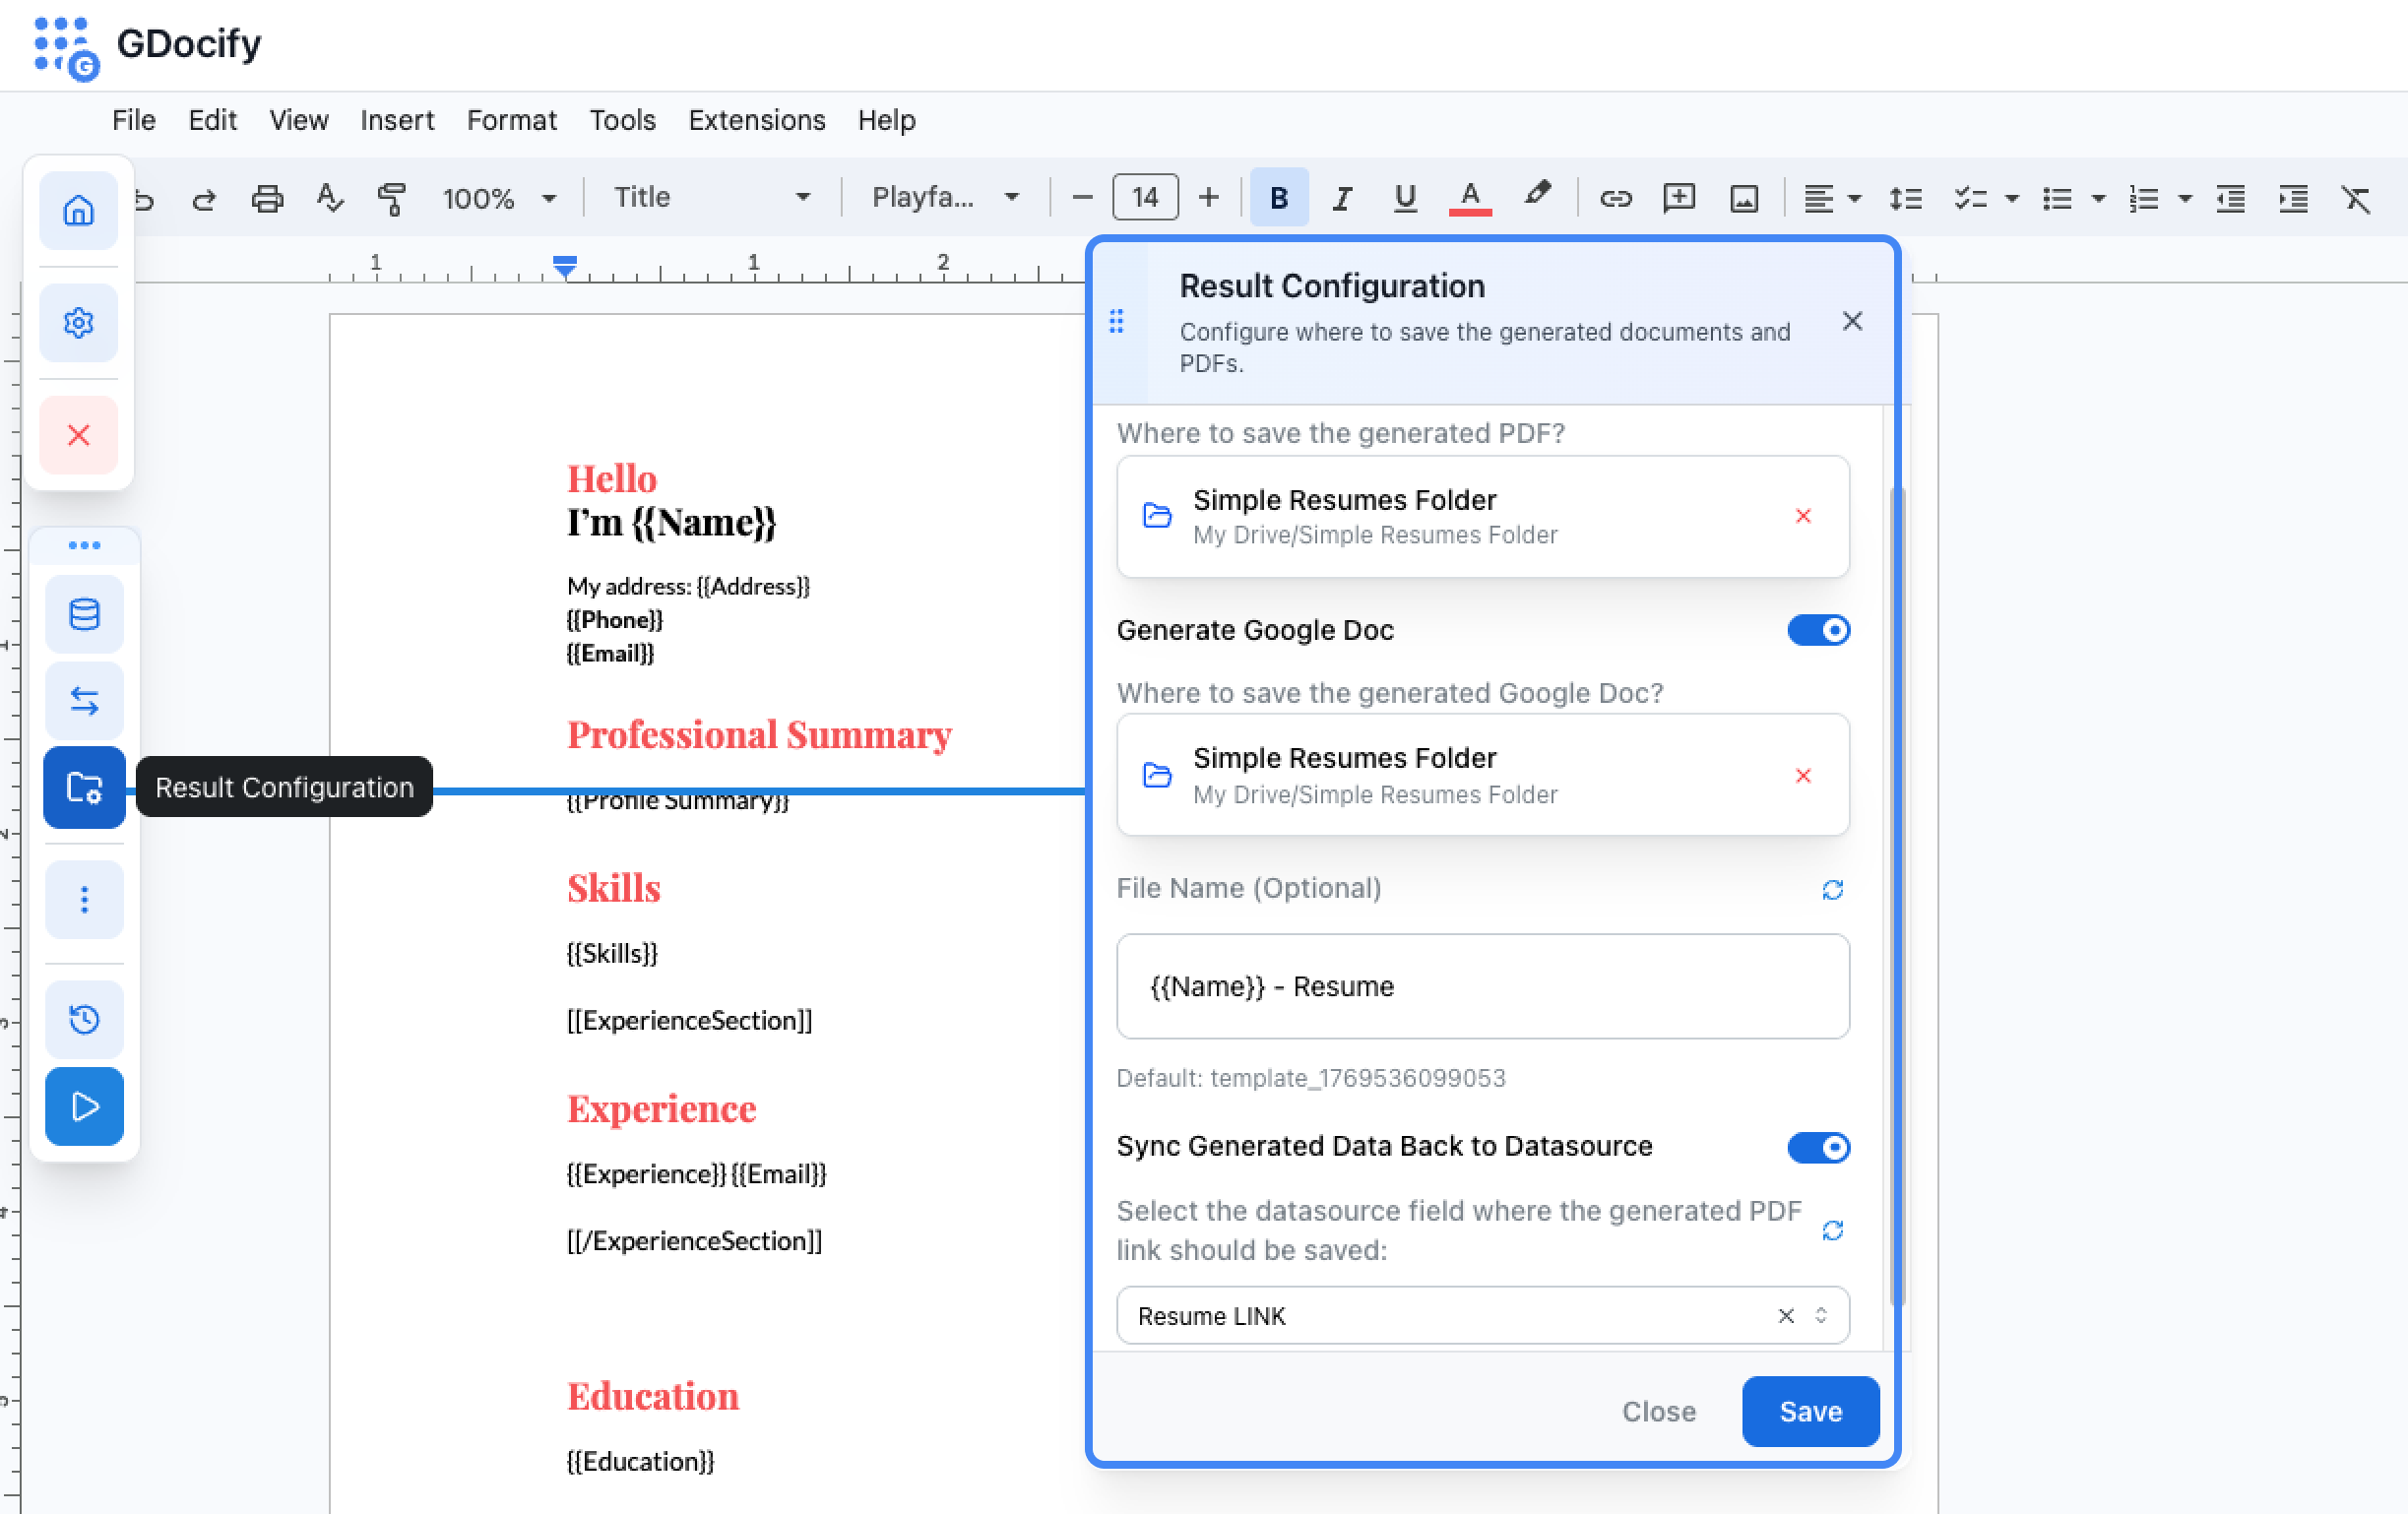
Opening Result Configuration
- Click the "Result Configuration" button (left floating button)
- You'll see options for PDF and Google Doc
Configuring PDF Generation
PDFs are great for sharing and archiving:
- Enable PDF generation - Toggle the switch to "On"
- Select save folder - Click "Choose Folder" and use Google Drive Picker
Configuring Google Doc Generation
Google Docs are editable and collaborative:
- Enable Google Doc generation - Toggle the switch to "On"
- Select save folder - Choose where to save the generated docs
Filename Templates
You can use placeholders in filenames to make them unique:
{{candidateName}}_Resume→ "John_Smith_Resume"{{invoiceNumber}}_Invoice→ "INV-001_Invoice"{{candidateName}}_Resume_{{date}}→ "John_Smith_Resume_2024-01-15"
You can create folders in Google Drive and select them in Gdocify.
Example: Resume Generation
For resume generation, you might configure:
- PDF folder: "Generated Resumes/PDFs"
- PDF filename:
{{candidateName}}_Resume - Google Doc folder: "Generated Resumes/Docs"
- Google Doc filename:
{{candidateName}}_Resume
This creates files like:
John_Smith_Resume.pdfin the PDFs folderJohn_Smith_Resume(Google Doc) in the Docs folder
Updating Your Data Source
Optionally, you can configure Gdocify to write back to your data source:
- Simply select the field you want to update from the dropdown
Tips
- Use descriptive filenames: Include enough information to identify the document
- Organize by folder: Keep different types of documents in separate folders
- Test the folder: Make sure you have write access to the selected folder
Common Issues
- "Folder not found": Make sure you've selected a folder and have access to it
- "Permission denied": Check that Gdocify has permission to write to Google Drive
- "Duplicate filenames": Add unique identifiers to filenames
What Happens Next?
With result settings configured, Gdocify knows where to save everything. Now you need to set up triggers to actually run the automation. Continue to Step 6: Set Up Triggers.